Tuesday, January 19, 2010

Gluten Free Diet

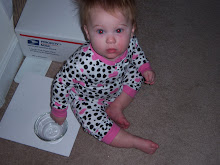
So my daughter had to go to the ER about a week and a half ago because of a rash. We couldn't figure out why she had a rash and she wasn't acting any different. We sat down and thought about all the foods she had eaten and the frequency of it as well as how it effected the rash. The rash slowly got worse over a 3 day period and the only common thing in her diet over those 3 days was pasta. So the ER doctor thought that maybe it was a gluten allergy and had us stop all gluten.

After 2 days of a completely gluten free diet the rash was completely gone. I then introduced just a small amount by way of 2 bites of a cookie. The rash came back. Confirming until she can see an allergist that we think it's a mild gluten allergy. So being the good mommy I am I set out to conquer the gluten free diet.

After doing research on what all things contain gluten and what to avoid I was shocked. You wouldn't believe all the things that contain gluten. First there are the obvious...cookies, cake, pasta, bread, pie, and oatmeal. Then there are the things you don't think about. Malt contains gluten so things like malts and malted milk balls are out of the question. Most oats and what you would consider the typical "starches" contain gluten.

The only "grains" she can eat are rice and corn. After thinking about it I'm glad to announce that I am no longer scared of a gluten free diet. We're going to tackle this bad boy head on and I'm going to expand my culinary skills to include a gluten free diet. My daughter will be 1 in March and knowing that cake contains wheat flour I thought it'd be a bit of a tackle finding a baker that would do a gluten free cake for her. After searching for local bakers I sent out a slew of emails. I was pleased to find that the first baker I contacted indeed did gluten free cakes. So we ordered her birthday cake and a smash cake from her. The smash cake will be the only gluten free one but I figured I'd go ahead and order the regular cake as well. I'm so excited about her cake.

Being the curious person I am though I thought to myself "I wonder if I can make a gluten free cake". I figured it can't be any different from making a regular cake right? The tackle for me however is that I am not a baker. I love to cook. I can stand in the kitchen all day long and enjoy every bit of hit. However baking isn't my forte. But with a daughter who may have a gluten allergy I'm going to have to get use to it and learn how to bake. And not just regular baking at that....gluten free baking. I want my daughter to be able to experience all the yummy foods that are out there. Including things like pancakes, waffles, cookies, cake, bread, muffins, and all the other kid friendly baked goods. What kid doesn't love a mom who bakes them fresh cookies right? So that is my new goal for the year.

I'm going to search high and low until I find a gluten free flour and then I'm going to start baking up a storm. I'm going to learn to make homemade muffins. How to make a cake from scratch. Cookies that are gluten free. Because of this I'd like to issue an apology and forewarning to the men who work with my husband. Watch out cause I'm gonna be baking up a storm and guess where I'm sending all these cookies, muffins, and cakes when I'm done? YOUR WAY!!!

Sunday, January 10, 2010

Pasta Salad

Pasta salad to me is one of those SUPER easy and quick sides you can make that go with just about ANY meal. I personally love pasta salad so much that I'll even eat it as a light lunch or a dinner. HAHA. It's no lie one of my favorite foods but I really don't like any that you find premade at the stores or restaurants. I like to make my own. It's taken me many years to perfect the dressing and lots of experimenting to figure out what were the best additives. But after all that experimenting I now know the exact perfect mixture for my own pasta salad.

For the dressing remember that it's basically a vinegrette dressing. A good rule of thumb for making vinegrette is a 2:1 ration of oil:vinegar. That's how most vinegrettes are. I personally prefer a more "sour" dressing so I make my 2:1 vinegar:oil instead. You can experiment with the ratio and find your own perfect balance but I do suggest starting with a 2:1 ratio. As far as the type of oil I suggest only ever using EVOO. For the vinegar though this is a personal prefernce. I like to use 1.5 parts White Distilled and .5 parts apple cider. Other good vinegars are Balsamic Vinegar, Raspberry Vinegar, Red Whine Vinegar, White Wine Vinegar, and just about any sort of "flavored" vinegar out there. Ones that might not make a very good vinegar would include Malt Vinegar and Rice Vinegar. Rice Wine Vinegar would be a personal preference sort of thing.

Once you have your base for your dressing figured out you then get to start playing with spices and herbs. Here's a list of the spices that I find are good:
Basil
Oregano
Parsley
Cilantro
Garlic
Onion Powder
Chives

Once you figure out the type of herbs you like in yours then comes the fun part!! Figuring out your "veggie" additives. Here's a list of all the veggies I have found that are great in pasta salad:
Pepperocini peppers
Banana peppers
Green olives
Black olives
Kalamata olives
pimentos
capers
sweet peppers
pepperoni

Next is your cheese. I have found that Feta and Parm are the 2 best cheeses. I like to mix in the Feta cheese and then sprinkle the top with parm. Romano is another good one but I don't usually use it for mine. Just like everything else that I post in the way of recipes play with it. It may not come out perfect the first time or even the second. But don't give up. Keep playing with it and eventually you'll find your perfect pasta salad. :)

Saturday, January 9, 2010

Easy Glazed Ham

So my friend had asked me how I glaze/season my hams back around new years and I was going to post it up here but had totally forgot about it until just now. So I figured I'd go ahead and post it up here for ya'll. My mom use to do this EVERY year for Thanksgiving AND Christmas AND New Years. It quickly became both of my brothers favorite thing. It's SOOOO delicious and the technique is easy. I'll warn you that it's a bit time consuming but it's worth it I promise.

1 large bottle of Clover Honey (if you can find the honey that has the comb in it then I HIGHLY recommend that over ANY other type. But if you can't Clover Honey works just fine)
1 large spiral cut SMOKED ham (this is CRUCIAL!! It MUST be a smoked ham otherwise it won't work. No honey glazed flavoring.....SMOKED!!!)
1/2-1 cup of WHOLE cloves (I'm not EXACTLY sure how much I use but I do use quite a bit)

1. Take your ham out of the packaging and wash it. Place it in your roasting pan and make sure you preheat the oven to the time the packaging says (I think we usually do 350?!....ish maybe?).
2. Once your ham is washed and in the pan you can begin the tedious part. Take your whole cloves and stick them stem side into the skin of the ham (if it's got a sliced open side and not 2 "end" sides then do NOT stick them into the meat part....just the skin). You don't have to make a patter because they will be removed after it's cooked. Just randomly stick them all over. If you like a bold flavor use more. If you like a milder flavor use less.
3. Once the skin is covered in cloves slowly drizzle the bottle of honey all over the entire ham. Covering every inch of it. Cover the pan loosely with Aluminum foil (I always do this even if I have a lid....the aluminum foil loosely allows steam to escape but not dry out the ham)
4. Be sure to bast the ham once every hour until the last hour of cook time. Then be sure to bast the ham twice...3 times if you want. This step is crucial in keeping your ham moist and flavorful. It recoats the meat with the honey and allows it to soak up more of the flavor. (cook the ham according to the package directions as it's different for every ham)


Now I want to explain why I say to follow the package directions. Because I didn't specify whether you have to use a bone in or boneless (which it REALLY doesn't matter which you use....i prefer bone in for more flavor but it's not necessary). Whether it has a bone or is boneless will effect the cook time and temperature. So be sure to cook it according to the directions on the wrapper. :)

Cheesy Chicken and Rice with Broccoli Bake

This was requested by my good friend Heather and I feel awful for it taking me a couple days to post but I just now found it. :) This is always a favorite of mine but I haven't made it in a while.

1 bag of frozen broccoli
3 chicken breasts
1 1/2 cup of rice
3 cups of chicken broth
1 tbsp butter
1 tbsp olive oil
1 tbsp dried parsley
1 tsp dried oregano
1 tsp Garlic & onion powder
1 jar Cheese Wiz cheese sauce
2 bags shreaded cheddar cheese
salt and pepper to taste

1. Cook the rice in the chicken broth with butter until soft. Fluff with fork.
2. While the rice is cooking, in a skillet heat the Olive oil over medium high heat. Cook chicken breasts until golden on the outside, roughly 5-6 minutes each side. Once cooked dice the chicken into bite sizes pieces.
3. Place broccoli in a pot of water and bring to a boil. Boil for 6-8 minutes until soft. Drain and chop pieces into bite size pieces if there are some that are too big.
4. In a microwave safe dish place the cheese wiz. Place in microwave and slowly melt. (I heat it for 1 minute intervals as to not burn it). Once the Cheese sauce is melted mix in the spices and 1 bag of cheddar cheese.
5. Once the rice is done mix the chicken, broccoli, rice, and cheese sauce in a large bowl. Pour into a casserole dish. Cover with the last bag of cheddar cheese and place into a preheated 375 degree oven. Allow to bake until cheese is melted and bubbling. The chicken will finish cooking while it's in the oven so don't worry if it's a tad pink in the middle.


Some great varieties to this are to add bread crumbs to the top. To accomplish this I like to take a bag of savory herbs Stove Top and beat with a rolling pin until they're fine. Then sprinkle on top of the cheese once melted and allow to bake for another few minutes. You can also add diced onions and green peppers to this dish or cauliflower and carrots as well. :) If you like your dish really really cheesy you can use 2 jars of cheese wiz and it'll make it SUPER cheesy. I also like to use a Cheddar and Monterey Jack blend for the top of mine. :)

Jambalaya

So I finally made my homemade Jambalaya last night and it was SPECTACULAR. An absolutely amazingly delicious dish!! :) I can't remember the last time I've had such a delicious Jambalaya. hehe. Here's my recipe:

3 cups Chicken broth
3 chicken boneless skinless chicken breasts
3 links of red hot sausage (or andouille if you can find it but I can't here)
1 lbs Shrimp
1 1/2 cup white rice
2 tbsp dried parsley
1 tsp Cheyenne
1 tsp Chili Powder
2 tsp Cumin
2 tsp Black pepper
1 tsp Garlic Powder
1 half onion diced
1 green pepper diced
1 large tomato diced

1. First prepare your sausage by slicing it and dicing up your vegetables. This way you can quickly add everything.
2. In a large deep skillet (or dutch oven if you have one) heat 1 tbsp olive oil over Medium High heat. Cook chicken breast until golden on each side (roughly 5-6 minutes per side). Once all your chicken is cooked transfer to cutting board and dice your chicken. Don't worry if it's a little pink inside because the chicken will finish cooking.
3. In the same dish add your chicken broth and allow to heat up for roughly 3 minutes scrapping the yummy drippings from the chicken off the bottom. This will help season the dish so don't drain and be sure to cook the chicken in the same dish you're going to make your meal in.
4. Add the diced chicken, tomato, onion, green pepper, all spices, and rice to the chicken broth. Stir and cover. Cook for 15 minutes.
5. After 15 minutes add your sausage to the dish and re-cover. Cook for an additional 3 to 4 minutes. Add Shrimp (I use fully cooked and cleaned shrimp so I add it for the last few minutes to keep them from getting tough and too chewy). Re-cover and allow to simmer for an additional 2 to 3 minutes or until rice is tender. Stir. Allow to cool for 5 minutes. Don't worry if the sauce seems thin as it'll thicken as it cools.

Now remember that I scaled down the amount of spices for a basic recipe. Please feel free to increase the amount of cheyenne, chili powder, and black pepper as you see fit. Salt to taste when adding the seasonings. :)

Sunday, January 3, 2010

Pizza Pasta Bake

This is one of those quick and easy meals from my childhood that I decided to whip out tonight. It's oh so delicious and so simple. It's a great dish for kids as they always love pizza and spaghetti. Here's the recipe:

1/2 pound Ziti pasta
1 lbs ground italian sausage
1 bag of mini pepperoni
3 jars of pizza sauce
1 bag of mozzerella cheese (or italian blend)

1. In a large pot bring some water and salt to a boil and add pasta. Cook until al-dente.
2. While the pasta is cooking and you're waiting on the water to come to a boil brown your italian sauasage in a skillet.
3. When the sausage is done layer in a long baking dish. Scatter the pepperonis on top of it.
4. When the pasta is done cooking toss with sauce and then pour pasta and sauce over the top of your meat layer. Top with cheese
5. Place into a preheated 375 degree oven and bake until cheese is melted and bubbling.

Here are some great variations and additives for this dish:

For a healthy alternative use Italian turkey sausage and turkey pepperoni. You can also use Marinara sauce (2 jars) instead of pizza sauce for a healthier alternative as Marinara has less salt. You can use low fat cheese as well and whole wheat pasta for a really healthy dish that tastes great.

I topped my meat mixture with sliced olives and canned sliced mushrooms. You can also use just about any vegetable you like on your pizza and you can also add canadian bacon to it as well. Remember that this is like a pizza without crust so play with the toppings. Use what you like on YOUR pizza. You can add some garlic to the sauce if you like your sauce a little more garlicy. This is just a basic recipe for the dish so remember to play with it and make it your own.


Saturday, January 2, 2010

Burrito Bowls

So I decided to do Burrito Bowls for dinner tonight. When I made it in FL I made cilantro lime rice, garlic black beans, taco beef, and Baja Citrus Chicken. Tonight I'm switching it up a bit. I've made Saffron Rice, Lime Garlic Black Beans, Mojo Chicken (a spicy lime marinade flavor), and of course pico de gallo. Here are the recipes for the rice and beans.

Lime Garlic Rice
1 clove Garlic
1 can black beans
1/4 cup fresh lime juice (1/8 cup concentrate works fine)
1 tbsp butter
1/4 cup water
salt and pepper to taste

Drain beans and place into a sauce pot with all ingredients. Put on low heat and slowly heat for roughly 8 minutes. (the longer you simmer it on a lower heat the better the beans capture the flavor)

Easy Saffron Rice
1 bag of boil in bag rice
2-3tbsp Adobo Seasoning
1 tsp Saffron

Cook rice in water according to package adding 1 tbsp butter and 1/4 cup of chicken broth to the water as well as the spices to season the rice. When done place in a bowl and fluff with fork. You can add diced pimentos and black olives for flavor if you like (I always do but didn't tonight)

For the chicken I just simply cooked 3 chicken breasts in a frying pan until they were golden on the outside (still raw on the inside slightly). I then diced the chicken and then used a packet of seasoning I got from the store. I mixed the packet of seasoning with the oil and water and vinegar the packet calls for. Then I toss the chicken with the seasoning and place back into the skillet and allowed it to simmer on Medium Low heat for 10 minutes to finish cooking the chicken.